Showing posts with label defunkefying my craft room. Show all posts

Friday, January 22, 2021

Defunkifying the Desks

I am doing a total room organization again.
I am running out of space in my small craft room, so figured since we are in Lockdown with a stay at home order, now is the perfect time to do it.
I am going slow and steady and will post my progress and would love if you joined in!!

I am starting with my desks. 
The reason being that I we will need a nice area to organize and tackle all of our other supplies on.
Plus the desk is the first thing you see in my room and a clean desk screams "Lets create!"

I have 2 desks in my room and even though my room is tiny, I wouldn't have it any other way. Each desk serves its own purpose.
If the desks were cleared off, you would be able to see them both in this photo, lol.


This is my stand up desk.
I made this desk out of 3 bookcases and a large piece of melamine board for the top.
I like to stand up when I craft, so this desk is used for  when I scrapbook, art journal or make mini albums.
I have too much on this desk...not only do I need to put my supplies away but I also want to only have things I need at hand on here.
So I had to find another place to store all of my journals that I don't use daily.


I also have this tool holder that I picked up from Ikea a couple of years ago when I was in Winnipeg (sadly we don't have an Ikea here and the closest one, is 8 hours away).
I pulled everything out, and boy did I have a lot of pens and pencils. I took out the extras and reorganized the tools that I am keeping.


I had also added black foam core "X's" to the bottom cubbies so the tools wouldn't fall over and get lost. (I did his when I bought it... if it looks familiar).


Now look how clean and inviting this is!!
It's just screaming "come and create on me!!"
Plus a perfect area to organize my other supplies when I get to them.


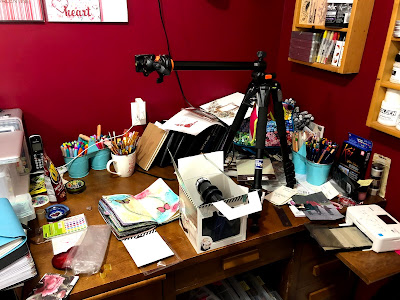
Now onto my second desk.
This is an old teacher's desk. I love this desk as I wanted to be a teacher when I grew up 😁
Plus this desk is perfect for when I work on my writing journals or when I colour, as I like to sit down when I do these things. 
Again I had to move my journals to another area in my home as they were taking up to much space on this desk.


Look how great it looks!!
I love colour and love to be surrounded by it.
So I kept out all of my colouring mediums because they just make me happy💗


Now here are both of my desks side by side.
How inviting!!!


I have created a few projects since I have cleared and re-organized my desks and they look just as great now as when I did this last week....go me, teehee.

If you would love to follow along and share your progress, let me know on here, or come over to my FB group "Tracys Treasures Shares"! 

I hope you all have a safe and creative day
Tracy 💗💗💗

Saturday, April 21, 2018

The Last Messy Room Tour

OK people it is time to get real...or at least its time for me to get real, lol.
I have been re-vamping, organizing or defunkifying my room off and on (mostly off) for what seems to be forever....seriously though, it has been a year or 2 that I have been working on it.
So here it is in all its glory and mess.

My craft room is downstairs in the corner, without any windows.
It measures 13 'x 7'.
But with my wall of cabinets it measures 13' x6'.....plus with the desk and such the areas are smaller.


Here is my desk.
My desk measures 6' x 2.5'
I made my desk by putting 3 book cases in a "C" shape and adding this piece of melamine on top of them.
I did re-work it a couple of months ago and like how it is now.
I like that I have more room to work on and I LOVE that my markers an other colouring mediums are front and center.
Looking at all of those pretty colours just makes me happy.


Here is the view of my room from when you first step into it.
I have this wall of cabinets and in the center of them is pegboard that I painted to match my walls.
To see the mess inside the cabinets, you'll have to check out the video.


This wall here is behind the door.
I usually have the door open, so the punches on the wall behind the door and hanging from the door can't be seen.
I love my wall of punches as well as how I have them stored in that wall  unit.
The tower is 4 units stacked on top of each other.
The first 2 units which is 6 drawers holds my washi tape.
The other 2 units holds my stencils and other embellishments.


This is my paper area.
I have my 12x12 paper pads in those black bins and my 6x6 paper packs in the cubbies.
The unit against the wall holds mini albums.


Believe it or not, I think this is the worst part of my room..its my little secret....
Because it is on the other side of my desk, it can't be seen when you walk into my room.
Those carts, I love them and and don't, lol.
I love them because they hold a lot of supplies and can be moved around.
I don't love them because it is harder to get out the supplies in the lower tiers and they take up space.
One held my colouring mediums and my art journal mediums.
The other held my journaling and planner supplies.....but now I don't know what is in what as they are all mixed up.
Those clear Iris containers hold layouts that need a home or need some photos.


Lastly this is my cutting station.
It is in my laundry room, which is just outside me craft room.
I really like this area.
What I need to do it raise that middle shelf so I can tuck my Cricut under the Brother scan and cut.

I love my little craft room.
The whole family took part in putting it together with me and I love the colour and that it is a space I can get lost in.
With that being said, I really need to take care of it and defunkify it.

I did a video in full detail of my room...every nook and cranny, lol.
If you would rather watch it on my YouTube channel (as on my blog, it seems to cut off part of the screen) here is a link to my channel "Tracy's Treasures 24"


I am going to be working on my room one area or one supply type at a time.
I am going to be sharing my process on here and my YouTube, but am also challenging anyone who wants to join me!
Every Saturday I am going to post the area that we are going to be working on, on my Facebook Group Tracy's Treasures Shares in the Files section.
I would love to see how you are doing!!

I am off to my daughter's house to help her with some organizing....hmmmm maybe thats why mine is a mess, lol.

Tracy 💗💗💗

Wednesday, April 20, 2016

Taking a Break from Defunkifying….Time to Clean

I need to take a bit of a break from Defunkifying my room.
As much as I am loving how it is coming together….I needed to clean it up a bit.
It was getting a bit dangerous in there…plus I seem to make an even bigger mess as I organize…odd, I know, but that is how I roll, l


Whenever I need to do a good room tidy, I always start with my desk.
I do this for a few of reasons..
1. It is the biggest area I seem to pile things on.
2. It gives the biggest impact when looking at it.
3. Where else would I put the floor stuff I need to tidy up, if not on the desk ;)


There, now doesn't that look a lot better…..maybe don't look under my desk anytime soon though;)
Just kidding, I cleaned under there as well.
I did a short video on this.
If you have noticed, I have been documenting this whole Defunkifying my Craft room, on both my blog here and my YouTube channel.
If you would rather watch this video on my YouTube channel, just click on the link "Tracy's Treasures24"

I am hoping to complete my room before summer and cottage weather hits us :)
Because once summer is here…that is it for staying inside :)

I hope you all have a very creative Day :)

Tracy :)


Thursday, April 7, 2016

6x6 Paper Pads…Defunkified!!

Time to organize my 6x6 paper pads.
Look how nice and organized they are…but they didn't start out this way.


Honestly though..I don't think my 6x6 paper pads were in all that bad of shape.
They were out of order and overflowing…but looking at my whole room, they weren't that bad, lol.


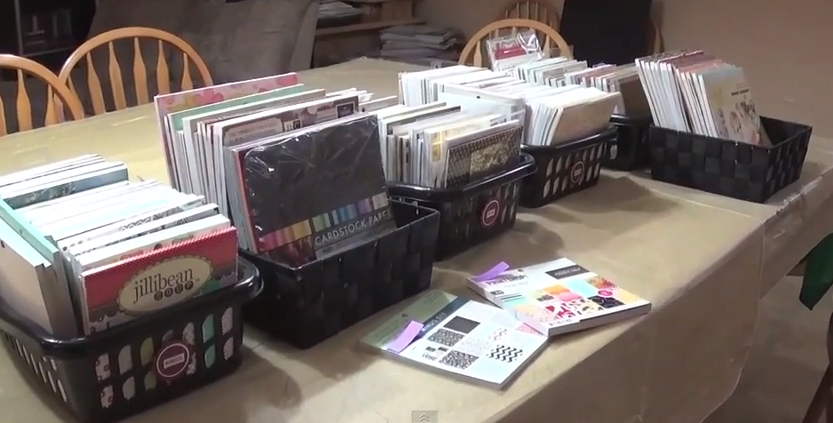
The first thing to do in defunkifying or organizing is to take all "like" items, in this case, my 6x6 and 8x8 paper pads, into a bigger area to work on them.
My scrap-pool table is perfect for this,


Next thing is to organize them in a way that works for you.
For me, my sections are
Vintage
Whimsical/Brights
Pastels
Seasonal
I then grabbed a couple of containers for my 8x8 paper pads.
I don't have as many of those so Vintage & Whimsical are in one container, then Pastel & Seasonal in a different container.
I only found 2 paper pads that I had doubles of, surprise, surprise.


Look how nice and organized they are…so pretty :)
I put the 8x8 paper pads in the very bottom of the shelves.


I did a video on my process on how I organized them and how they were before I did this.
If you would like to watch it on my YouTube channel, just click the link "Tracy's Treasures24"
Here are my tips on how to Defunkify your papers.

1. Remove- all of your papers that need to be organized
2. Sort - Put all like items together.
3. Purge- Donate or gift the paper pads you don't think you will use
4. Clean- wipe down the shelves or area that you are going to store your paper pads.
5. Organize- Put away and organize the remaining papers.

I hope you are following along with me on defunkifying my craft/scrap room.
If you are, I would love to hear what you are working on:)

I hope you all have a very creative day

Tracy :)

Wednesday, January 13, 2016

Tracy's Quick Tip....storing full sheets of Stamps


I love stamps....yes I do :)
I ordered online (shocker I know!!) some Unity stamps.
They came in these full sheets.


The only problem I could see with having the stamps come in these full sheets, is how to store them once I took them off.
So I thought, hey I can store these the same way I store my smaller cling stamps but on a bigger scale :)
I grabbed some thin acetate (as I have large sheets of them on hand ;) ) then clung the full sheet of stamps on the acetate.
Soooo no matter which stamp I take off, the rest of the stamps will be clung to the acetate :)

Here is a quick video I made showing exactly how I did this :)

I have been one busy lady lately....I will share with you soon what I have been doing :)

Hope you all have a very creative day :)

Tracy :)

Wednesday, September 17, 2014

What's on Your Workdesk…..A new look

If you read yesterday's post, then you know that I am working on my desk.
Here is a photo of my desk from a few months ago.
Not the most functional.
A bit mish mashy.


I took one of these shelves (its actually a shoe holder) and thought this would work.
Then I started to think, maybe 2 would be better.
But should I put them side by side, or one on top of the other?


Then I got to thinking maybe drawers would be better.
But then realized maybe the drawers would get in the way of my work space when I opened them.
Plus they stick out a bit further then the shelves, so maybe not the best.
These drawers are how I used to store my coloured papers, that is why the different coloured circles on each drawer.


So then I got to thinking, (as my brain can't leave anything alone)  how about if I put the drawers on either side of my work area.
I stacked one set on top of the other.


One of the reasons why I wanted to change how my desk works, is
1. I wanted certain supplies close at hand.
2. My spiny holder scrapes my wall when I turn it and I don't want to mess up my beautiful red walls ;)
If I keep it up here, on the one set of drawers, then it is far enough from the wall, not to scrape it.
I also put my journal cards in the centre as it looked kind of empty.


Then I got to thinking…why can't I have the best of both worlds ;)
So I put my shelf in the center of the drawer sets.
I think I like this the best.
This way I can tuck things in the drawers and put higher supplies in baskets in the shelves.

Now with me being as anal as I am, I think I am going to take my washi tape drawer (which is the exact same as these ones, minus the paper I added to the fronts) and put it on top of the one set.
That does mean that my spiny holder will have to be put to the side.

But as I like everything to by symmetrical, I think I NEED to do this ;)


I am going to link this post up to "Stamping Ground" for What's on your work desk Wednesday

I hope you all had a Creative Day today :)
I had a pretty exciting day today….but tomorrow will be equally exciting and I will share that with you tomorrow :)

Tracy :)

Wednesday, August 13, 2014

Defunkifying my Craft Room Video 3 Chipboard & Wood mound stamps

As you know I have taken a break from my craft room re-do or defunkifying my craft room as I have named it ;)
But here is my last video from May.
I had organized my wood stamps last year, but didn't share it as I wasn't sure if I was totally happy with it.
What I did do though, we move them to a different location in my room for easier access.
To move it to this cupboard, I had to totally clean out this cupboard.
More details on this in my video.


I also used these empty Ferrero Rocher chocolate containers for my chipboard pieces.
I also used these empty containers for my stationary/mail drawers as well.  Nothing like free storage containers ;)
Most of my chipboard pieces were in the cupboard above, again more details of this in my video.


And talking about my video…here it is.
I you would rather watch the video on my Youtube channel, just click my link "Tracy's Treasures24"
I hope you all had a very Creative Day :)

Tracy :)